Introduction to the RYLR-896 LoRa Radio


Introduction
LoRa Radio enables long-range transmissions with low power consumption while achieving data rates between 0.3 kbit/s and 27 kbit/s. In this tutorial, you will learn how to configure the RYLR-896 LoRa radio and use it to communicate from an Arduino or similar microcontroller.
The right tool for the job
While LoRa enables communication over quite a long-range while drawing little power, this does come at the cost of a low data rate. LoRa radio is useful for sending sensor information periodically over ranges where WiFi may not be feasible, but not for streaming real-time telemetry. I learned this the hard way after installing a LoRa radio onto my "Finnley" model rocket's flight computer with the intent of streaming real-time telemetry down to my laptop, to find that I was only able to receive data about once every 1-2 seconds -- much too slow for this use case. I ended up pivoting its usage to instead be used to send commands to the rocket and update its settings on the fly, which has had much more success.
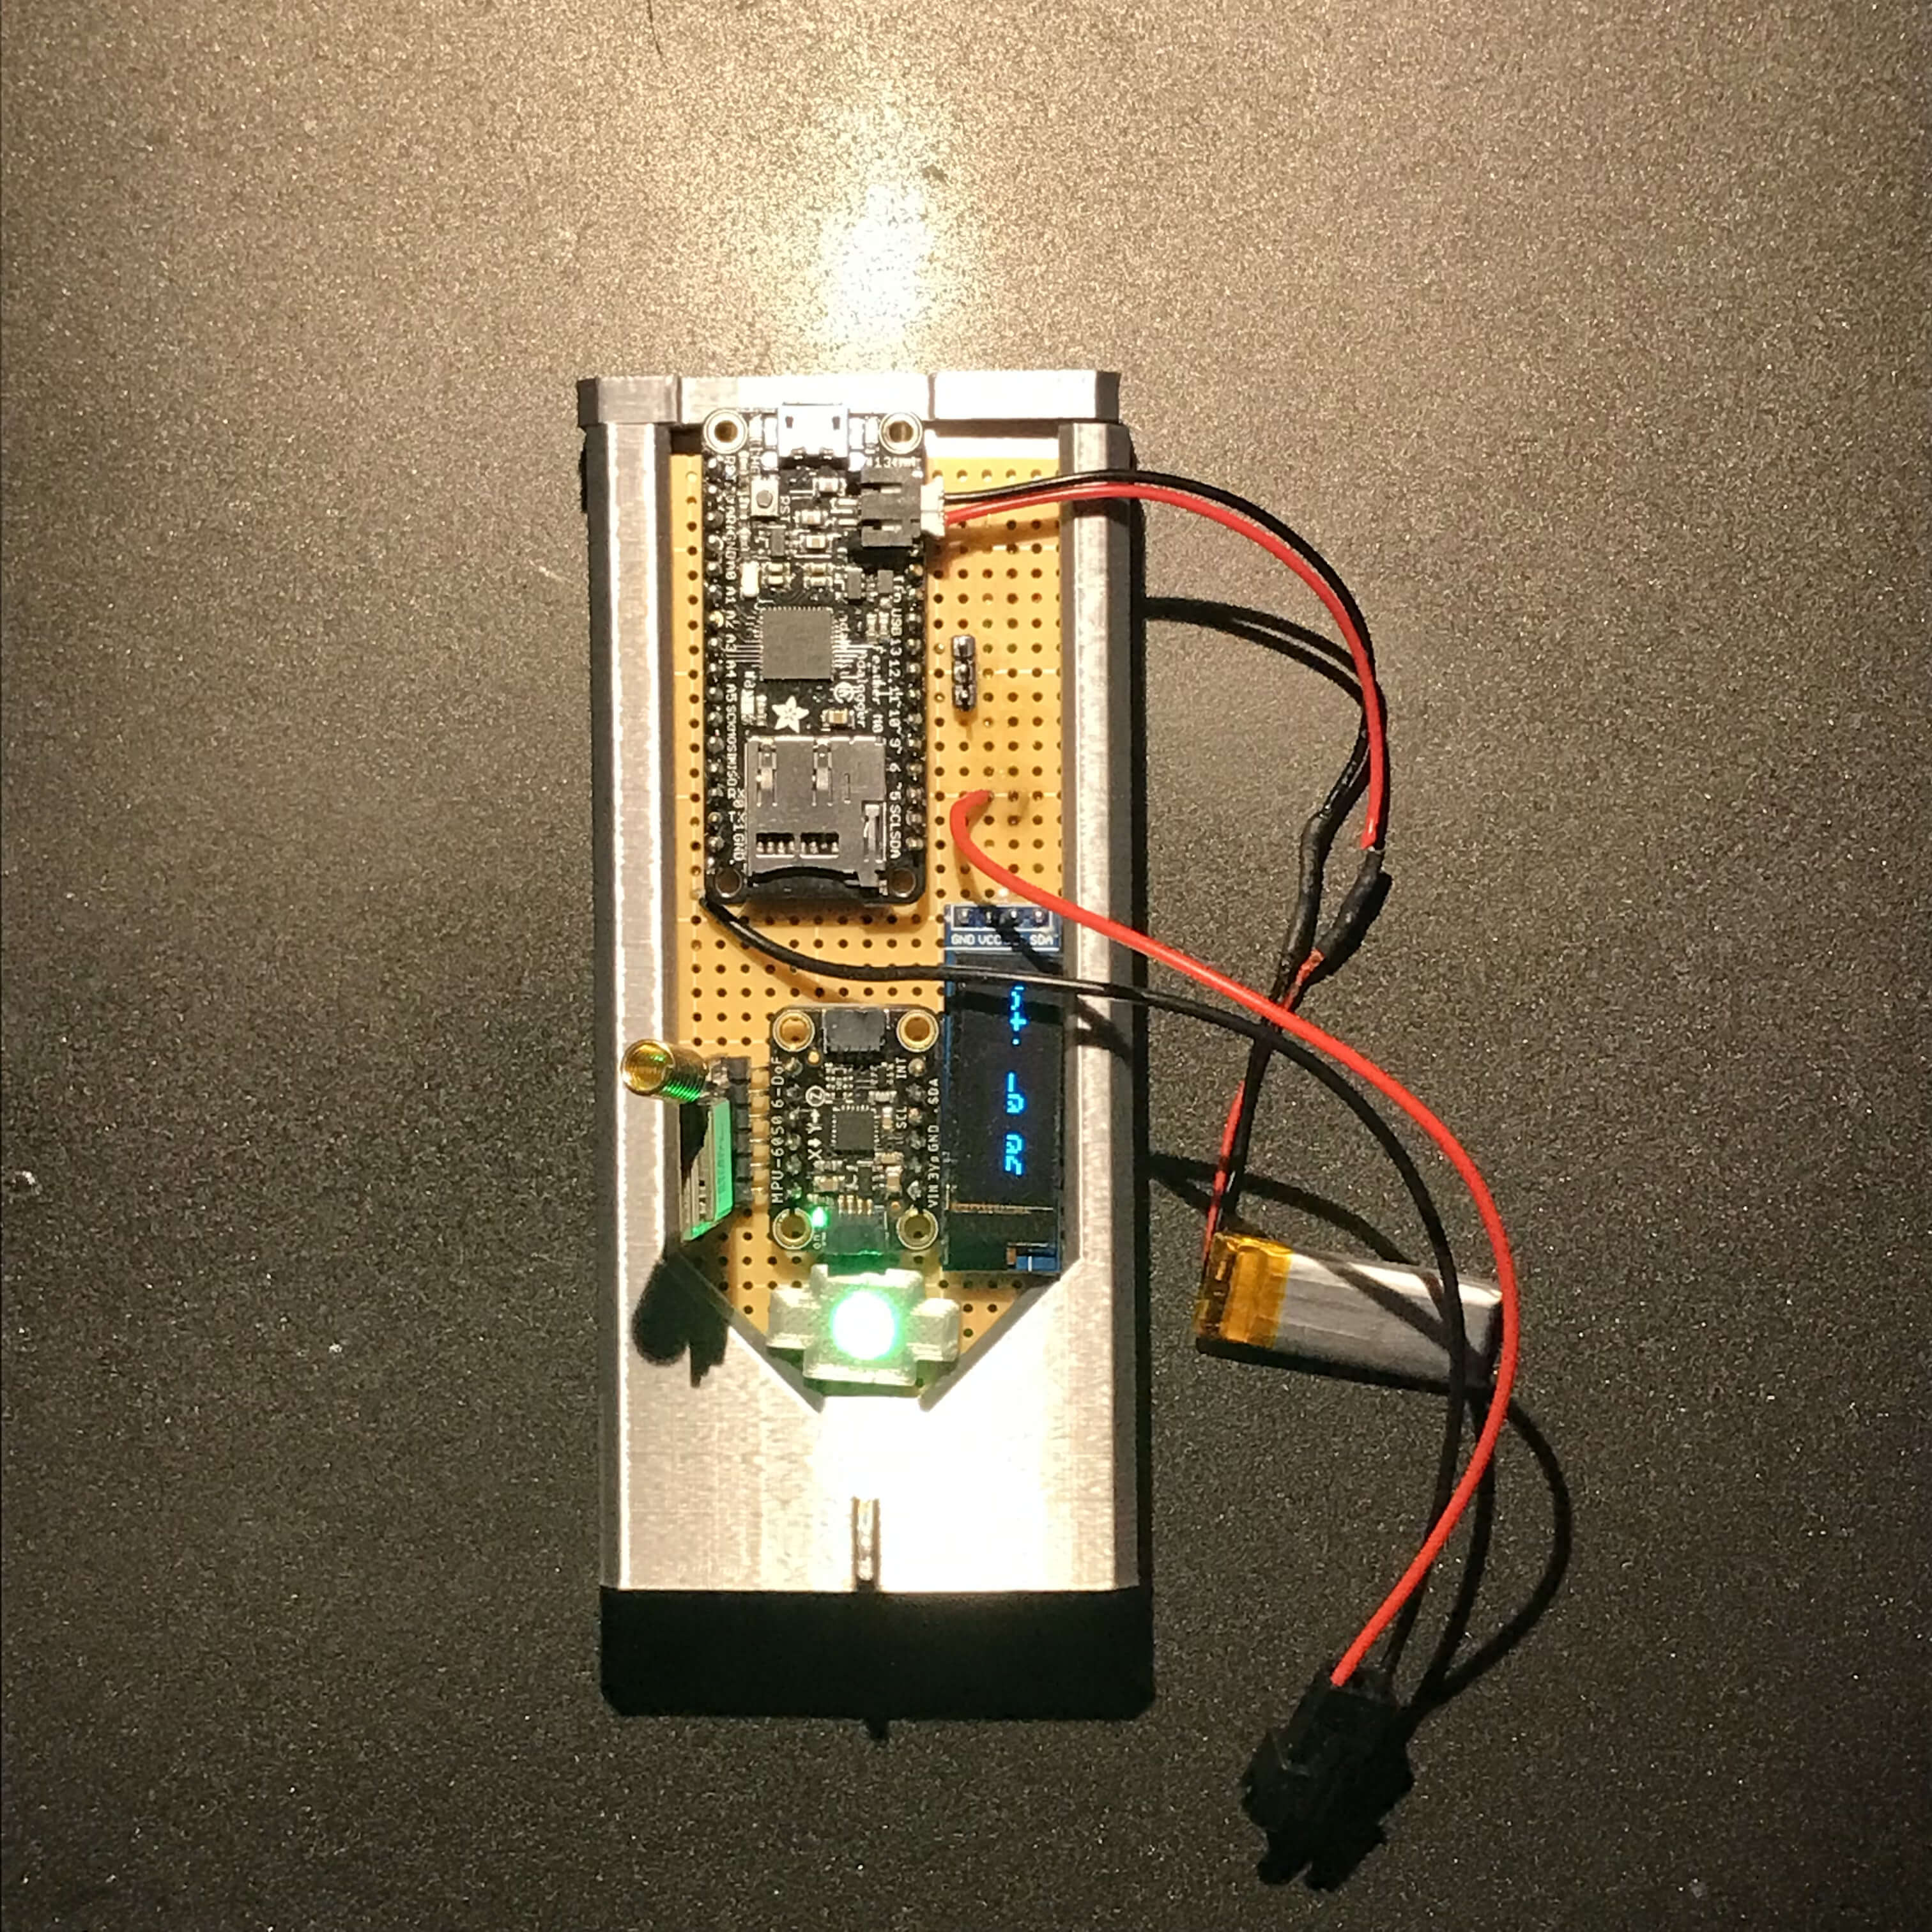
An RYLR-896 connected to the flight computer for my "Finnley" rocket
Use with Arduino
In most use cases for LoRa radio, you will probably control it with an Arduino or Arduino-compatible microcontroller such as an ESP-8266. To connect the RYLR-896 to an Arduino, use the following connections:

Notice that TX on the micro is going to RX on the radio and vice-versa
Now that you have your radio connected to your microcontroller, let's talk about how you control it. Controlling this radio is done via AT commands, which are short text strings combined to produce commands. You can view the entire command set here, but I'm also going to explain the commands that you'll use most often here in this tutorial.
Initial Configuration
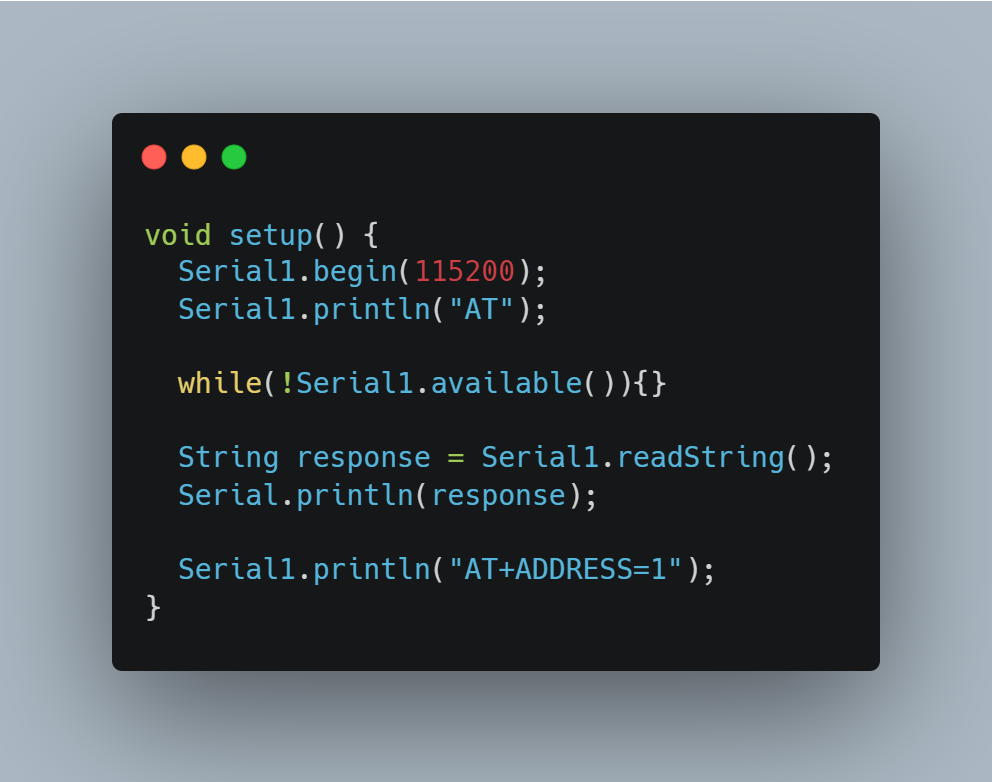
As you may have already noticed, the radio is connected to the serial communication pins on your microcontroller. This means that you will send commands to the radio the same way you would send text to the serial monitor. On some microcontrollers such as the Arduino Nano, the RX and TX pins can be controlled using the Serial1 class to read and write data. Note that Serial1 is different from Serial, which will just use the USB port on the board.
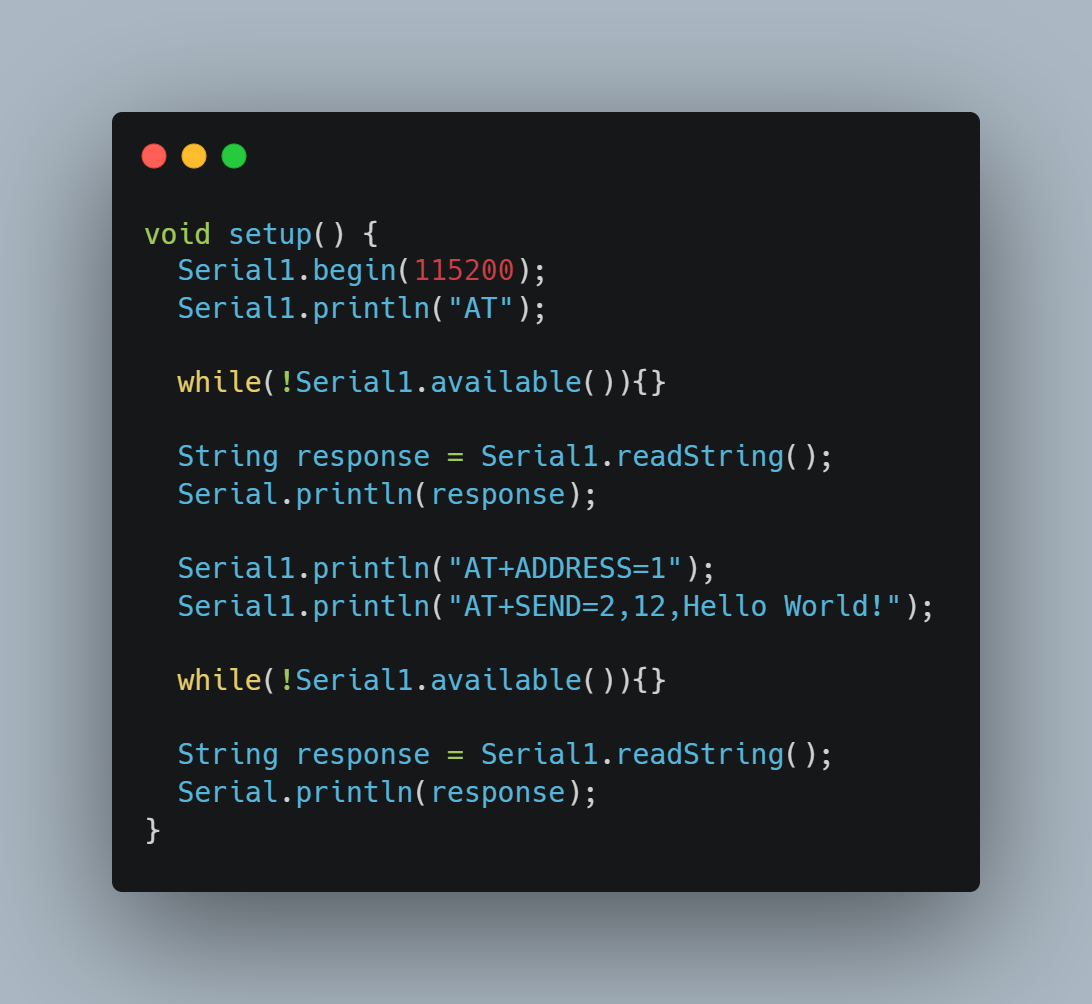
First, let's make sure that the radio is connected correctly. The snippet below sends an "AT" command to the radio, and this specific command is mainly used to make sure that the radio is connected, powered up, and listening to commands. After that, we want to listen to see if the radio sends a response to our command, which if everything has worked correctly should be "+OK".

Next, we need to assign an address to our radio before we can use it to communicate with another radio. To do this, we will use the "AT+ADDRESS" command. This command is used to set the address of your radio and can be any number from 0 to 65,535.
Since you will want to have at least two radios, you will also need at least two microcontrollers. Set up the radios on your other micros the same way, just making sure to set a different address on that last line.
Sending Messages
Now, we are finally ready to send a message with our radio. To do this, we are going to use the "AT+SEND=<Address>,<Data Length>,<Data>" command. This command takes 3 parameters, which are:
Address (The address that this message will be sent to)
Data Length (The length of the data string)
Data (The message string that you would like to send)
The below snippet will now also send the string "Hello World!" to the radio with the address "2". If all goes successfully, your radio will then send the message "+OK" to your microcontroller to say that it successfully sent the message. Your microcontroller will then display that message in the serial monitor due to the last two lines added.
Receiving Messages
Now that you know how to set up a LoRa radio and send a message with it, the only thing left to do is to learn how to receive messages! This is extremely simple, as the RYLR-896 stores received messages in its Serial buffer. Therefore, you can read your received messages by just reading from the Serial1 interface.
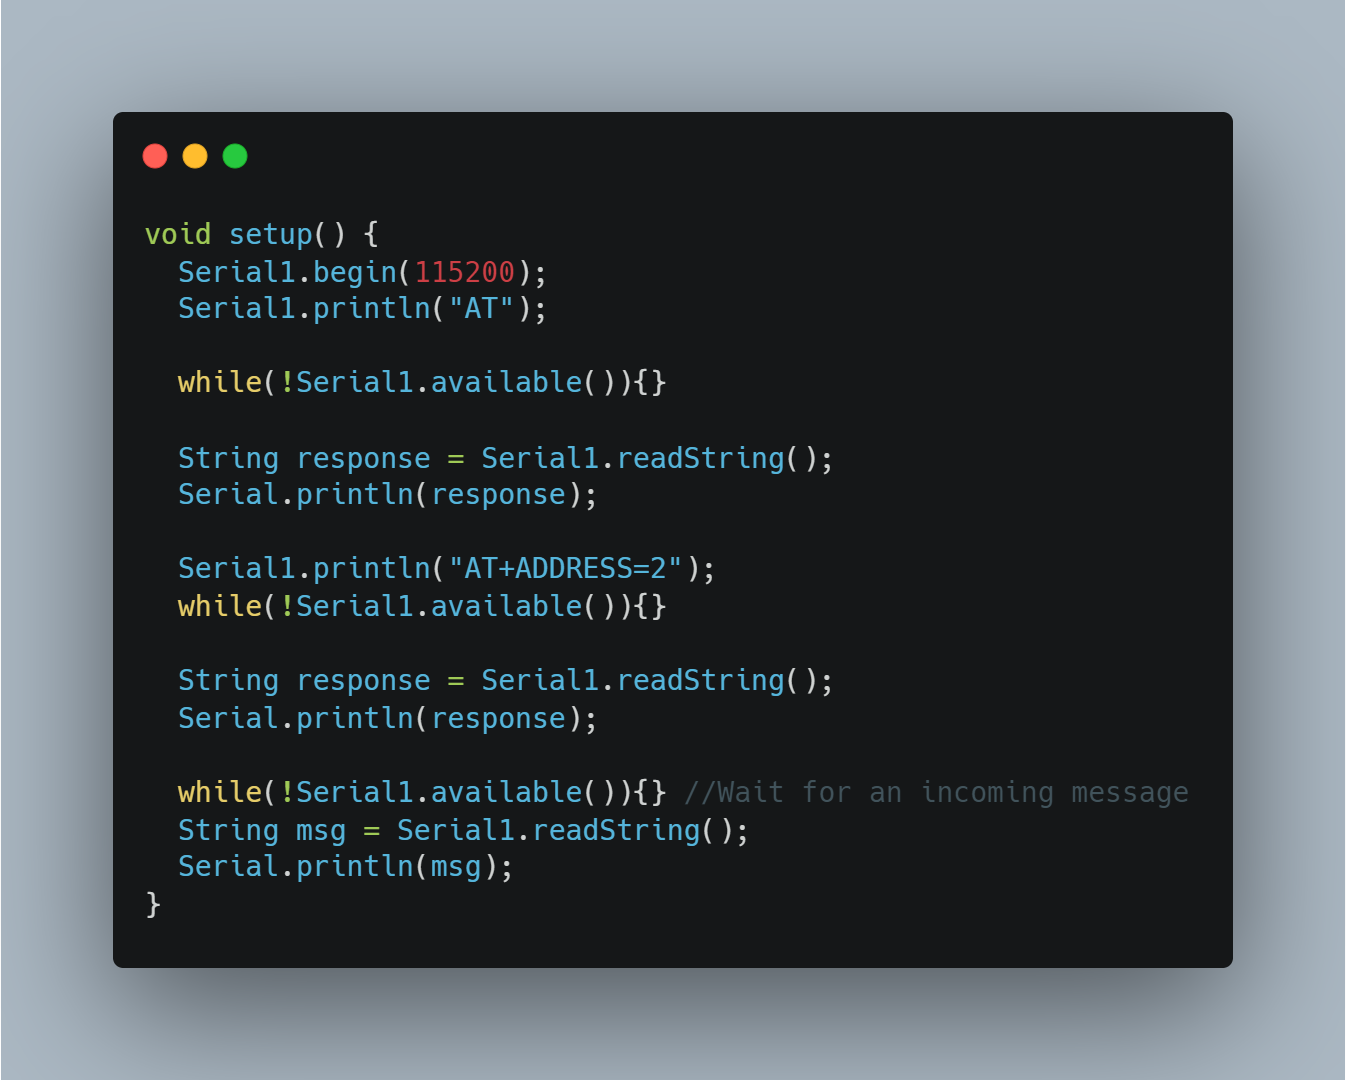
If you turn on the microcontroller running this program (microcontroller #2) before turning on the microcontroller running the other program (microcontroller #1), you should see that microcontroller #2 will print "Hello World!" to the Serial monitor! If this happens, congratulations you have now mastered LoRa radio communication!
Next Steps
Now that you have this example working, you can easily swap out the "Hello World!" for any other data that you would like to send, such as sensor data or commands to be remotely executed, you just have to remember to also programmatically set the "Data Length". Also, you may want to utilize the fact that the radio replies "+OK" to any commands successfully executed to implement error checking and handling, as well as filtering that out from being printed to the Serial monitor. All in all, LoRa radio is great for sending small amounts of data over long distances, with minimal power consumption. Just make sure that it is the right tool for your job, and you'll be all set!